Showing posts with label DIY. Show all posts

April 9, 2014

Coffee/Wine Bar

We have this little patch of wall, right between the pantry where our kitchen ends and the doorway that opens up into our living room.  It's kind of an awkward size space, so we have played around with different things there since we moved in.  A little while ago, I discovered that our wine rack fits perfectly in the space, so we have had that sitting there since.  But, the wall above the rack was pretty blah, and needed some sprucing up.  Nick found a bunch of reclaimed wood on craigslist, and it sits in our garage waiting for inspiration to strike.  Well, inspiration struck recently, and Nick decided to piece together some of the wood to create the perfect shelves.  We made a little coffee bar on top of the wine rack and put coffee/tea related items on the shelves.  Nick also drilled some hooks into the lower shelf so that we could hang mugs from it.  And voila, we've got ourselves a wine/coffee bar.  Come pick your poison.
I am also happy to report that our backyard is blooming, which means I get to have fresh flowers all around our house!


This is the espresso maker that we have.  I've never had a cup of espresso from it, but I have steamed many cups of milk with it, and it's never done me wrong.  And, Nick says the espresso is excellent.  So, I highly recommend it if you are looking for a nice, but more affordable option.  And it is now $60 cheaper than it was when I bought it!

follow: Facebook / Bloglovin' / Instagram / Pinterest / Twitter


February 13, 2014

DIY Cupid Costume

As you saw a couple of days ago, I made a little cupid costume for Silas. I thought I would post about how I made the costume in case any of you are wanting your children to grow up to resent you too.  The most complicated (but not complicated at all) part of the costume was the wings, so I will start with those.

WINGS
1) Start with 2 hangars.  If you have baby hangars, that would probably work best for a little one.  I did not have baby hangars, so my kid had giant wings. Tape the two hangars together to create your two wings.
2) Using the fabric of your choice (I used felt), fold it over, and place the hangar on top.  Then, cut the fabric out around the hangar, keeping it folded, so that it can fold around the hangar.
3) Slide the hangar inside the opening, then open up your fabric to lay it flat.  Fold the edges over the ends of the hangar and sew (or glue) the fabric over the hangar.
4) Add some stuffing to the middle of the wing, then fold the rest of the edges under. Fold the fabric back over the hangar and sew or glue it closed.
5) Repeat the process to the other hangar.
6) Take a scrap piece of fabric and wrap it around the center.
6) Take some toilet paper, and form bunches. I used about 3 sheets for each bunch.  Glue onto the wings using fabric glue.
7) Your wings are done!

BOW
Now for the bow.  This is beyond easy. Find a stick that is bent in the shape of a bow, then tie string/yarn/ribbon to it.

QUIVER OF ARROWS
I won't insult your intelligence by giving you step by step pictures of the quiver of arrows. For the arrows, I just cut out a bunch of hearts and triangles and glued them onto the ends of decorative straws.  For the quiver, I used an aluminum can and wrapped it in scrapbook paper.  Then I punched holes in the sides and strung some bakers twine through.
BABY 
Add a cute baby in a diaper, and you're good to go!


October 25, 2012

Our Kitchen

I feel like every room in my house is half complete, and therefore, I never end up posting about any of the updates that we do to our house.  But, knowing us, the rooms in this house will always be a work in progress, and if I wait to share things until they are completely complete, I will likely never share them. This is what our kitchen looks like currently, completely incomplete.
As I was scrolling though my old pictures from when we moved in, I was shocked, SHOCKED! to discover that I do not have any before pictures of the kitchen.  I specifically took pictures of every room in our house when we moved in, knowing that we would be drastically changing everything.  Apparently, I missed the kitchen.  What??  My mother will be so disappointed in me. 

But, do not be dismayed, because I do have some pictures that will allow you to see the changes that have been made thus far.  In particular, take note of the old enclosed florescent light box, which is now open and finished off with crown molding and canned lights, the white refrigerator which is now a beautifully large stainless steel one, the cabinets which are now white, and the horrifically hideous yellow paint which has since been replaced with a light gray/blue color.
Now, we are not even close to being done....but I feel so...very...close.  Here are the things which are left to do....
The counter tops have already been chosen and are being made as we speak.  We have the brick back splash and will put it in once we have the counter tops.  The sink goes in with the counters, and our new stove has been sitting in our garage for about two years collecting dust.  So, that just leaves finding a hood and an oven.  WE ARE SO CLOSE!

And, a special shout out today to my father-in-law, Tom!
Happy Birthday....and Go Giants! 
(As long as they aren't playing that Braves or the Angels.)


October 10, 2012

Glitter Pumpkins

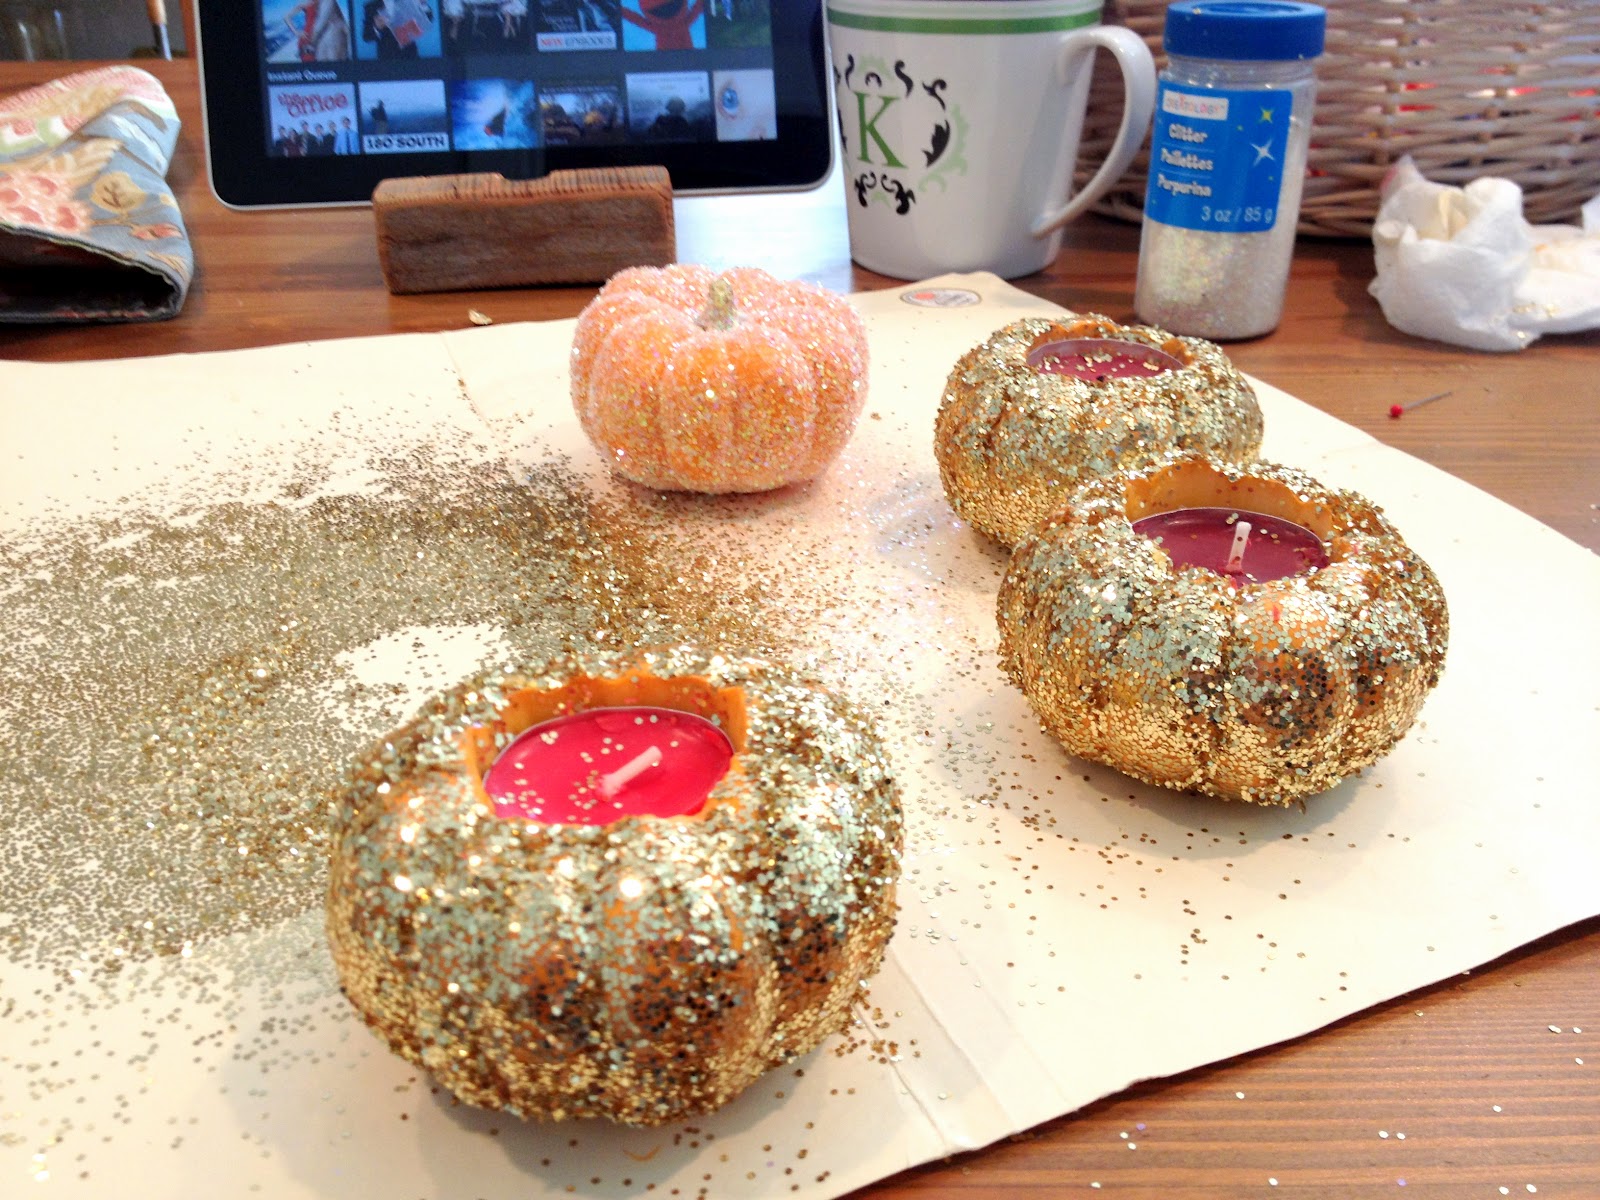
Over the weekend, I glittered a few mini pumpkins for fun.  I made these a few years ago minus the glitter, but glitter makes everything better...especially gold glitter.  I am sure that you could easily figure out how to glitter pumpkins yourself, but I am a little slow, and made several mistakes.  So, rather than show you a step-by-step of what to do, I will give you a little play-by-play of what I did, so you will know what NOT to do.

First, I sprayed the pumpkins with spray adhesive. No problems there.  Then, I dumped the glitter on.
That was mistake # 1.  I dumped the glitter onto the pumpkin on the same surface I sprayed the pumpkin on.  So, my first piece of advice is to use one surface for spray adhesive and one surface for glittering.  You would think that I would remember that after the first pumpkin, but I kept forgetting, and wasted half my glitter.  But, the manila folder I was using is quite beautiful now.
Once the pumpkins were glittered, I cut holes in the top to fit a candle.
And that is where mistake #2 comes in...cutting the holes AFTER the glittering.  Half the glitter came off the pumpkins in the process, and I had to re-glitter over again.  I would cut the hole first, scoop out the insides, then put the top back on for the gluing and glittering.
But, they got done, and they are dressing up my house for fall now.
This one is my favorite.  I need to get more mini pumpkins so I can make more like this one.
And now you can go make your own!  Because, without this little tutorial, I am sure you would be at a complete loss for how to do this yourself....right?  Maybe someday I'll be cool enough to post a real tutorial.  Although, that's doubtful.  Unless you want a tutorial on how to not get pregnant...because I am really good at that!


August 11, 2012

Here's What I've Been Working on All Week

About a year ago, I saw a lonely little dresser sitting out in front of a neighbor's house with a free sign on it.  I have a soft spot in my heart for unwanted household items (as you can see here), and when I saw that little dresser, I wanted it badly.  Nick took some convincing, but lucky for me, I'm good at convincing, and before long, he was hauling that dresser into his car for me.  Upon closer inspection, once we got it home, we realized that this dresser was a piece of crap.  We wanted to put it right back out on the street in front of our house, but thought it would be kind of embarrassing if the neighbor we took it from saw it.  So, we sat it on the side of the house, and there it has been for the last year.

But that all changed the other day when I saw a picture in a magazine that inspired me.  I pulled that dresser out from the side of the house and went to work.
The dresser did have drawers.  I just didn't think to take a before picture until after I had already painted them.  I decided to only paint the drawers and the sides of the dresser, and I was not too concerned about what it looked like.  I didn't even take the handles off the drawers when I painted.
Then it was time to add plants and put the whole thing together.
I wanted to put a chalkboard out there, and decided to write a Bible verse on it that was fitting for the garden but that would also be encouraging to me.  More on that later.
And that's that.


June 30, 2012

New Soap Dispenser

Every time my sister comes over, she gets mad at me for not having a proper soap dispenser at my kitchen sink.  She has been bugging me to make this mason jar dispenser forever and even brought the mason jar to me herself.  I finally got around to it, now that it's summer.  There are all kinds of tutorials on line for this and it's pretty self explanatory, so I am not going to insult your intelligence by writing out the step-by-step, but I will show you the process.
It was so beautiful, that I decided to display that little dispenser on a cake plate next to the sink.
And somehow, doing dishes just seems so much more enjoyable now.  Okay, that's a lie.
See that white tile.  It will soon be gone.  New counter tops coming soon!  The kitchen is halfway done.  The cabinets are all white now and half our appliances are stainless steel.  I can't wait for it to be done.
(But the stupid bathroom seems to be getting all of our attention these days.)


June 26, 2012

Nick built a bench

He built this bench a while ago, but I decided that I wanted to make it a little more of a focal point in our living room.
Now that it's summer, this house is my baby.  So, I hope to post lots of before and afters and do lots of fun decorating and projects.